|
|
|
|
|
 |
 |
|
|
Software 3D
|
|
|
|
|
|
Here's a collection of various attempts at software 3D rendering/rasterization that I've made over the years, separated from the various raytracers that you can find on their own page.
During my Amiga teens I tried making some Wolfenstein-like 3D raycasters, but I didn't fully comprehend the idea of perspective projection and they usually ended up with pretty nasty barrel distortion. I basically shot/walked rays and used the distance directly to scale pixel columns rather than projecting them onto a z axis. Rendering speed was terrible in AMOS, getting maybe 1 fps at a very blocky resolution (like 40x40 pixels). I remember doing some tests with texture mapping and letting the screen render for 10 seconds to see how it would turn out.
Below are some more recent variations that are more or less presentable.
--
 raycamber.zip raycamber.zip
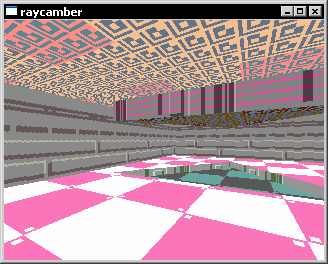
I spent two days in 2008 making something similar to the original Doom renderer, with polygonal 2D sectors of different floor/ceiling height. They are "real" and not faked using more conventional geometry - rendering is done by casting rays from sector to sector, intersecting edges. Textures are automatically applied as expected.
One of the random goals of this project was to make the source as compact as possible. Not counting my class for elementary vector math, all rendering code fits within 200 lines of C, and the level definition and program setup is another 100 or so. I tried to still keep it readable, so there's no crazy obfuscation or overly dense code structure in use. The source is included in the above zip, if you're curious.
Another goal was speed (I was competing against a friend who made something similar). It renders at about 750 fps in 320x240 on my 1.9 GHz machine, which shouldn't be too bad given the development time.
--

This was the result of reading some articles on screen-space ambient occlusion. I wanted to try it but didn't feel like setting up an OpenGL environment with unfamiliar framebuffer operations, so instead I wrote a triangle rasterizer with linear interpolation to render a model with depth buffer. I blurred the depth buffer and used the difference between blurred and unblurred at each pixel to make some fake cavity shading. It kind of worked. Also done in 2008.
--
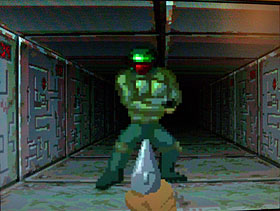 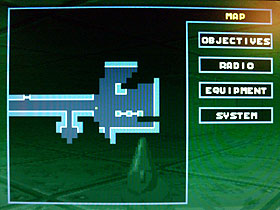
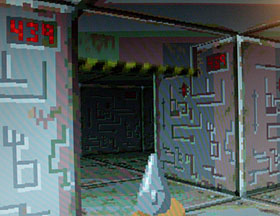 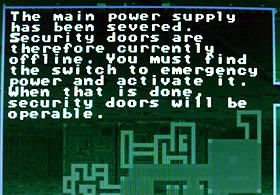
 dungeons.zip (will try to run in 320x240 fullscreen, 256 colors) dungeons.zip (will try to run in 320x240 fullscreen, 256 colors)
Heh. I had to snap screenshots using my camera since this one runs in 256-color mode, and Windows doesn't seem too keen on printscreening that. This was made way back in 2002, but was of course still very retro in terms of technology and game style. The rendering is a typical Wolfenstein 3D affair, with square wall tiles, fixed floor/ceiling and sliding doors.
There are also enemy sprites, and I actually made some rather convoluted optimizations for rendering them, using an RLE-compressed depth buffer. Basically, as far as I can remember, each vertical column was encoded as segments of depth values, initialized to "infinite" (floor and ceiling were ignored since sprite entities couldn't move vertically and were always in front of both planes).
When something had to be drawn, segments were clipped and inserted into this structure - for a sprite, this would mean multiple (precomputed) segments for different opaque parts of a pixel column. The idea was that large sections could be rapidly culled if there was something in front of it, without having to scan each pixel. I doubt it was much of a speed-up in the end, and the game actually runs pretty slow (well... mostly 60 fps I guess, but not with much room to spare). I did have a nice challenge with the depth structure though, for a few days.
--
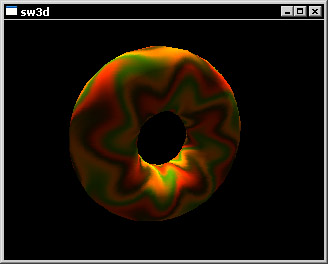
Of course, a torus. Made in 2001. Gouraud shading, texture mapping. No perspective correction, no subpixel precision. The torus model was generated in code.
--
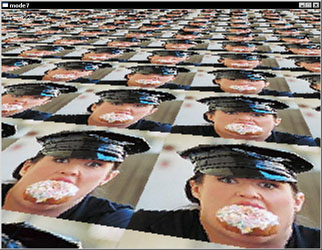
Rather vanilla textured plane. Actually coded in 2008. Probably took me an hour or so. It was made during some conversation regarding mode7 graphics, and I realized I hadn't made one of those before.
It's always refreshing when you get a silly idea, fire up the old code editor and find yourself with a working implementation shortly thereafter.
Back to all projects
|
|
|
|
|
|
|
 |
|
|
|

